FAB LAB UPDATE!

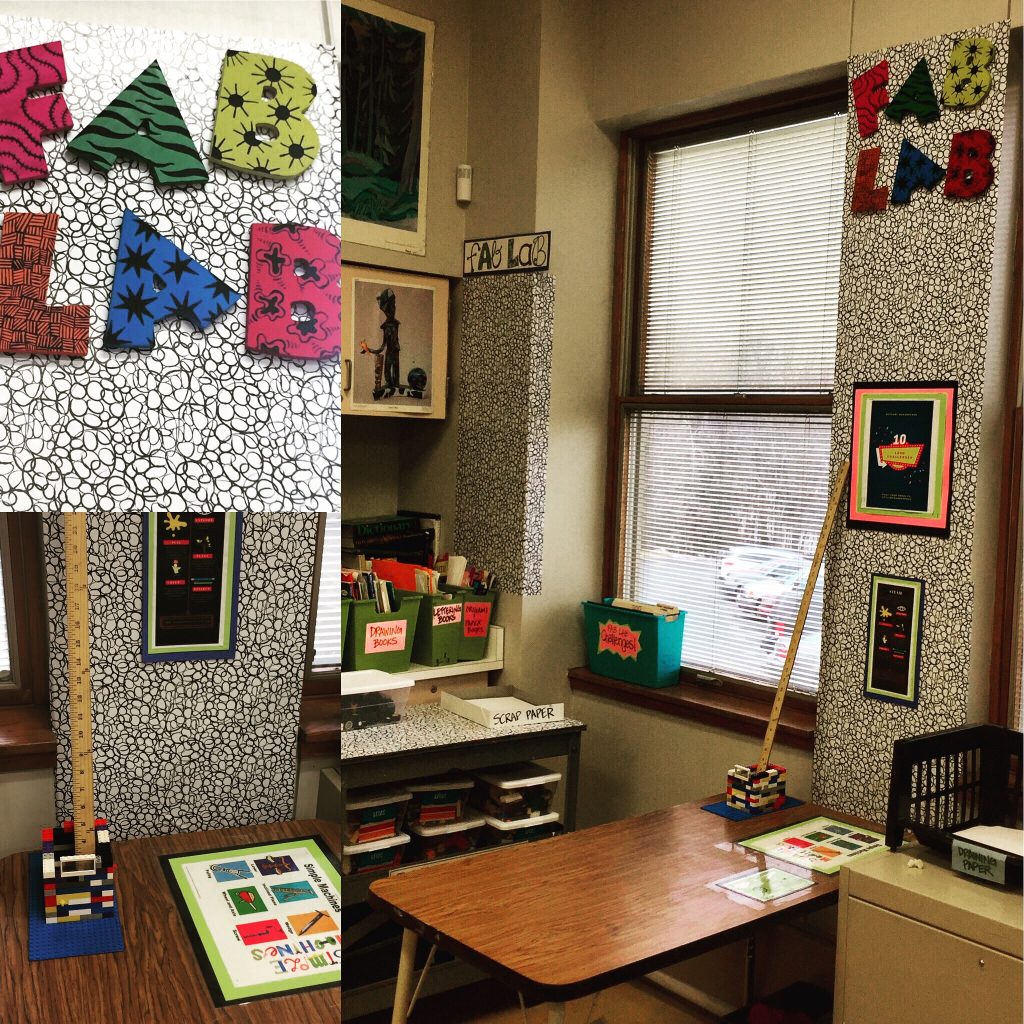
In a previous post, I introduced my latest STEAM endeavor,  “The Fab Lab”. Treating it as a seed that will grow throughout the school year, I was eager to share the development of this “makerspace” for students over the course of the school year in my blog. Here are some of my goals and observations (and a few reality checks) from our classroom experiences with the “Fab Lab” since December…

GOAL #1: ORGANIZATION…or controlling the chaos!

I rallied my students during the month of November to help sort and organize the enormous amount of legos that my smART partner and I accumulated last school year. After putting out an email request to teachers and staff, we were fortunate enough to have bins and boxes of old legos donated to the art room. However, this also meant that there were miscellaneous toys, matchbox cars, dinosaurs, shooting cannons, figurines and dinosaurs mixed in. While the kids loved finding all of the “retro” discards, I knew we needed a system to help guide the students towards constructing and learning through play. It’s amazing how side-tracked a 6th grader becomes when he or she finds an old toy from someone’s past!

We decided to organize the legos into categories. We separated legos into bricks and blocks, flat pieces, doors and windows, axles and wheels and bridge pieces. I provided several bins and ziploc bags to sort the legos that did not fit into those categories, which meant we had bags of lego figures, lego dinosaurs, etc. The kids and I did a pretty good job of getting through a couple of storage bins and I felt good about the system we had in place. I figured students could look for the designated bin to find specific pieces they needed based on the challenge. 

REALITY CHECK…

So, it’s been a couple of months of legos in the Fab Lab and the legos are no longer organized at all. They are all mixed together, but the kids don’t seem to mind. I learned to let go of my lofty goal of “organized bins” to help students find specific pieces and just let the students search for pieces amongst what is there. I think having all sorts of legos together in a bin allows for more creative exploration during their building challenges. The students are building and testing their creations through trial and error and I think that is furthering their exploration through play. I also find that they are willing to collaborate when they are forced to “share” a bin. Thus, I have now purchased classroom sets of bins with lids that house legos for each individual table. Students share. There is less bickering over legos and the groups that sit together are usually pretty good at sharing with one another.

GOAL #2: ROTATING THE MATERIALS EVERY MONTH

Our initial goal of the Fab Lab was to offer students a chance to complete themed challenges using  different materials each month. Since our students still have traditional art projects to complete during instructional time, the Fab Lab serves as a space where students can go when they finish a project early. This means that some students who work at a fast pace get to spend a lot of time in the Fab Lab and others don’t. I wanted to make sure that students had an opportunity to work with the materials long enough to accomplish the building challenge, while also learning how to best use these materials based on what the goal was. I quickly learned that a month was not sufficient.

REALITY CHECK…

After reflection and conversation with students, I realized that one material per month was not going to be enough time for students to participate in the challenges. My smART partner and I concluded that the materials should stay out for an entire marking period before switching out to a new theme. The students were happy with this arrangement because they could spend more time building and collaborating towards their goals. PS. The legos have been out a bit longer due to interruptions to our schedule and the students wanting more time!

In addition, I learned that not every challenge could be started and completed in the short amount of time a student may be in the Fab Lab. A student would spend time building and testing a constructed piece, only to have to deconstruct it at the end of the period. I have now created a small storage space on a cart in my room where students can leave their “constructions in progress” so they can continue to work on them during their next time in the Fab Lab. By allowing students to store their pieces, I have also found students are able to truly test and revaluate their creations in a more constructive way.


GOAL #3: THE LEADERBOARD!

Everyone knows a challenge is more fun when there is some healthy competition! My smART partner and I created a “Leaderboard” with different categories based on the number of challenges completed. Students track their completed challenges on a “Bingo-style” board. The teacher signs off on the challenge as the student demonstrates completion. It is the student’s responsibility to keep their “Challenge Card” as evidence of their status. Students get their names on the leaderboard once they have completed a certain number of challenges and then can move to a new level.

REALITY CHECK…

While the leaderboard is still up and running, the students take awhile to move between levels due to the ambitious nature of the challenges. I think that for our next rotation, we may have to reduce the number of challenges to be completed so students can advance a bit quicker. However, I do have one student who is diligently working her way through the challenges, even coming to the art room during my prep periods! She is up to challenge 10 out of 12!

LEARNING THROUGH PLAY IS VALUABLE…

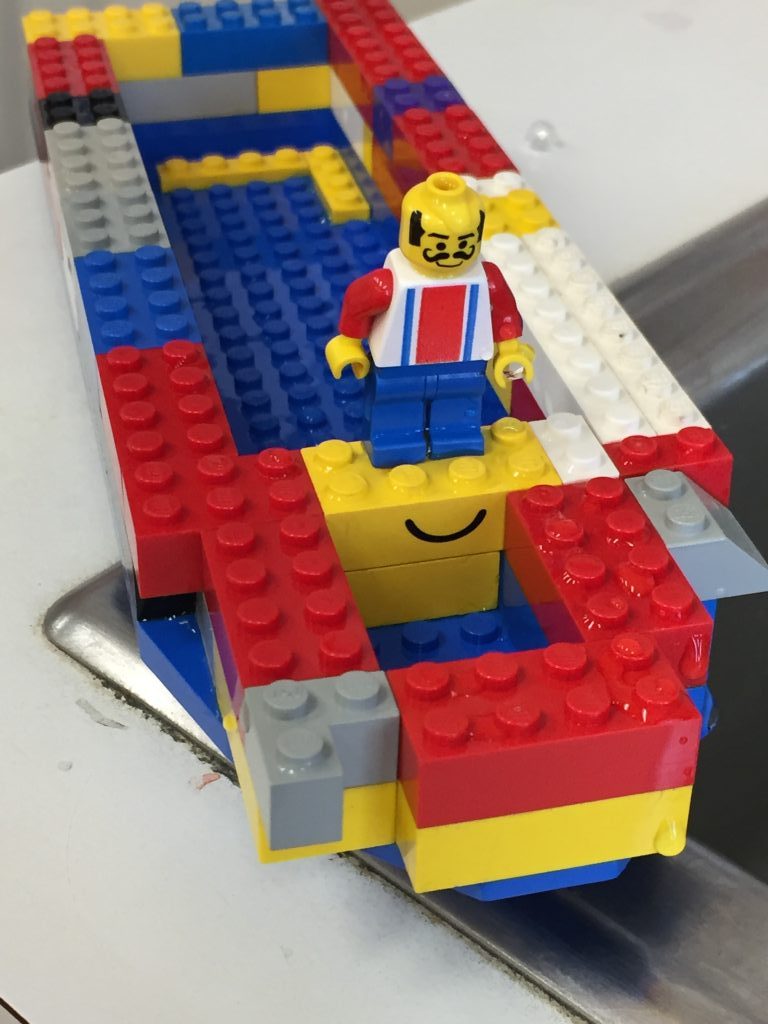
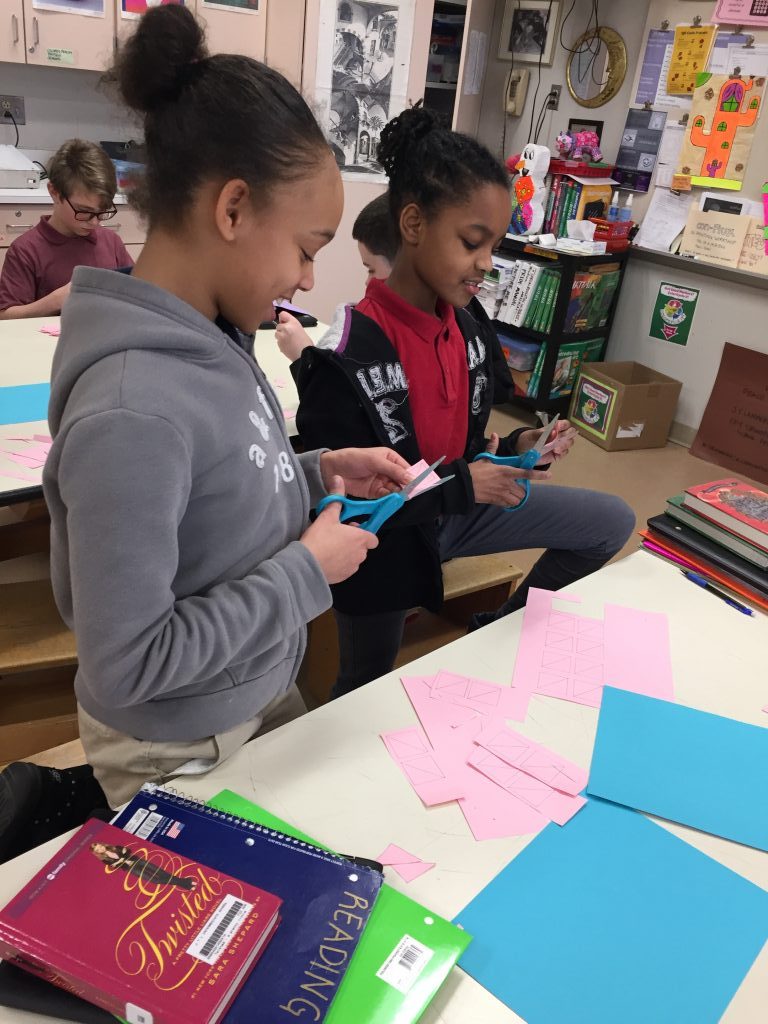
Another important aspect of the Fab Lab is that students really are learning through play. It is so fun to watch students enjoy a break from studio time and just be kids! As they sort through the legos, get excited to test out one of their creations and conquer a challenge, I get to witness their enormous pride. I love watching students collaborate to reach a goal.  Students test their engineering skills through unconventional drops, running water, adding shoes and marbles to their creations to test its strength…the novelty hasn’t worn off. I like that the challenges have multiple solutions and there is not a “right or wrong way”. The seed has been planted in my students and their natural curiosity and self-discovery in the Fab Lab keeps the momentum going. 

STILL NOT GIVING UP…

As any good teacher knows, your first attempt at something isn’t always going to go as planned. It takes time and reflection to truly evaluate the success of a new initiative. I am still really excited about my Fab Lab and all of the exciting things we can do with this space. I am still taking as many professional development opportunities that I can to further my knowledge about STEAM and the makerspace movement. I continue to re-work the organization of the space, seek out new materials and challenges to do with students and get valuable feedback along the way. I look forward to helping my students grow through their creative experiences in the Fab Lab throughout the rest of the school year and into the future!

-Mrs. S


VALENTINE’S DAY STEAM CHALLENGE!

What do you get when you and your smART partner have the rare opportunity to collaborate compliments of a morning of testing? You come up with a fun Valentine’s, STEAM inspired, “brain break” for our 6th grade students!

GEOMETRY + ART = THE HEART CHALLENGE!

The objective for students was to use 20 congruent triangles (note the opportunity to teach geometry vocabulary in the art room?) to create a heart. Being the “smART team” that Miss Chris and I make, I got right to drawing 10 (quadrilateral!) squares and drew one diagonal line across to create the 20 congruent triangles. She dashed off to the copy room to make copies on pink and purple paper to celebrate our “Valentine’s theme” while I cut 12 x 18 paper in half for a colorful background to work on. Within 20 minutes, we had our materials ready for students!

Once the students arrived, we passed out materials and had them get right to work. The first task was to cut out all of the triangles. This took a little time, but they seemed to enjoy chatting while cutting offered a well-deserved social break after a quiet morning of testing!

Next they started to assemble their heart. They were given minimal instruction, except for the challenge requirement of using all 20 triangles. This definitely proved to be a challenge for some!

Some students came up with a unique approach to making their heart! This was a great “teachable moment” about how there can be multiple solutions to the same problem…

After some time, we were able to get a winner! The first student to make their heart successfully, using all of their 20 pieces, won the prize- a Valentine’s treat. Here are this morning’s proud winners…

What a fun “brain break” for our 6th grade students after two hours of testing! They got to be social, stand up while working, chat with one another, collaborate on solving the problem and challenge their brain in a fun way.

Happy Valentine’s Day!

-Mrs. S

HOORAY FOR SNOW DAYS!

It’s a snow day for teachers and students and we are all excited to have a day off!  It looks we have finally gotten our good ‘ol fashioned snowfall this winter in northeast Pennsylvania. It’s time to finally break out the snow pants, boots and sleds. While I am not a snow lover, I can’t remember the last time we had a good snowfall here, so I can’t help but be a tad excited about a real snowstorm!

Well, sometimes being stuck inside on a snow day also means there are lots of us getting bored. Now, I know! Students have all of the video games and apps to keep them entertained for hours. Let’s not forget the ability to text our friends, binge watch Netflix and watch our favorite “You Tube Heroes”, but what about some good old fashioned creative fun?

My smART partner and I subscribe to the amazing art education resource, https://www.theartofed.com/, for fantastic ideas, resources and inspiring lessons. We came across the “Snow Day Challenge” on their website https://www.theartofed.com/2016/12/08/snow-day-challenge/ and have been itching to share it with our students. Unfortunately, this winter hasn’t cooperated much, but alas, we have a snow day to share the “snow day art challenge” with our students!

SPREADING THE WORD…

We are sharing this art challenge in our online Google Classrooms so students can access it from home. What a great idea! Give students bonus points for being creative at home! We have already prepped the students that the completed art challenge is due the following school day, whether is is their “art day” or not. This way it is fair to everyone and doesn’t become an assignment without a deadline. The best work will be selected from all of the submissions and then the winner will be announced on our school’s local morning news broadcast, “Good Morning JTL”.

I’M BORED…

Need some other ideas for how to bust the snow day boredom? Here are a couple of great resources I came across that might be worth checking out…

  1. This blog has an enormous amount of ideas, complete with links to directions, so you can do all types of fun activities with kids! http://thehappyhousewife.com/homeschool/101-things-to-do-on-a-snowy-day-with-kids/  P.S. I think the arts and crafts list looks especially fun!

     2. http://www.ibtimes.com/what-do-kids-snow-day-10-fun-         indoor-outdoor-activities-parents-try-1794866

UPCYCLED CHALLENGES…

There are some super fun STEAM challenges that you can do with stuff you gave lying around the house. Ever try balancing a book off of a table using only sheets of paper and tape? Can you use paper to build something that can support the weight of a tennis ball? What about using cardboard to create a miniature golf course? Don’t want the kids swinging clubs in the house? Just roll that ball through a cardboard obstacle course.

MAKE SOME VALENTINE’S…

Valentine’s Day is right around the corner. How about having your kids make handmade Valentine’s for family members? Want to spread some kindness? Have the kids make Valentine’s to send to a local Veteran’s Hospital for the nationwide “Valentine’s for Vets” campaign. You could also make Valentine’s for a local senior home.

Of course, Pinterest has some great ideas, as well.

I realize not everyone gets to stay home with their kids, but I know I enjoy getting my kid off technology and instead creating, playing and making memories together.

Happy snow day, friends!

-Mrs. S

COLLABORATIVE PAPER CUT OUTS

This month my 6th grade students are learning about the French artist, Henri Matisse. I love teaching my students about Matisse. Not only did he create such colorful paintings and paper cuts, he always kept art a part of his life. From childhood through the end of his life, Matisse was always adapting his art to what he could do, rather than struggling with what he could not do. What a fantastic message for my students to take away!

While the independent studio project my students will be completing will be a painting that is based on an imaginative “Dream House”, my smART partner and I thought it would be fun for students to try their hand at “paper cuts” first. Our students learned about Matisse’s paper cuts and how he “drew with his scissors”. We showed them many examples of his paper cuts and discussed how Matisse interpreted his ideas using shapes and colors that expressed a theme. His shapes give the impression of an animal, figure, place, etc. in an abstract way. There are no realistic details, yet the viewer can still see what the artwork is about.

Image autorisée à Rosamund Young Tate par Rosamund Young
Titre : Les Codomas
Description : de la série : Jazz (Série de 20 planches
Auteur : Matisse Henri (1869-1954)
Crédit photographique : (C) Centre Pompidou, MNAM-CCI, Dist. RMN-Grand Palais / Philippe Migeat
Date : ~~July~~ 1946
Technique/Matière : découpé, gouache, papiers collés
Localisation : Paris, musée national d’Art moderne – Centre Georges Pompidou
© CNAC / Réunion des Musées Nationaux

In the artwork above, we discussed the simplified trapeze swings and the use of squares to indicate the spaces in the net that hangs below. The angle and placement of his paper cut outs indicate movement and the bright color create a whimsical quality that is reminiscent of a circus. The squiggly figures suggest the trapeze artists swinging from bar to bar. After viewing several examples of Matisse’s paper cut outs, the students were ready to try their hand at the “Paper Cut Out Challenge”.

Students were placed into groups and given a theme for the cut out collage. I used the online tool, Random Name Picker, https://www.classtools.net/random-name-picker/index.php to create a digital, interactive wheel that I could customize with topics of interest. I included topics such as animals, celebrations, fashion, video games, seasons, outer space and more. The kids had a great time crossing their fingers in hopes that the wheel would land on their favorite theme!

Once the students had their topic, it was time to get to work. Students were provided with a large piece of black paper, scissors, glue and assorted colored scrap paper. The instructions were simple: No drawing…only cutting! Everyone must participate and the final product must reflect the theme. The activity took two class periods. At the end of the second class, we voted on which paper cut-out was “the best” and that team won “Pride Points”, which can be redeemed in school for prizes and special privileges.

I was amazed at how well the students worked together and some of the impressive projects they created! I think it was a fun, collaborative activity for students. They learned to work together, the challenges of cutting without drawing first and practiced their design skills to reinforce many of the concepts we are learning about in art class.